


In our previous article (Issue 175) we looked at dealing with a small room’s first reflection points at the side walls, and also, the limitations of measuring a room’s response when planning to make any beneficial EQ adjustments. The off-axis reflected sounds from the loudspeakers are what may intrude into your listening experience more than you at first realize, because they contribute so much to the room’s overarching response – it’s very own and special sonic personality.
One observation that can be made is that when we make recorded measurements in the stochastic zone (or above the room’s transition frequency, known as the Schroeder frequency), the measurements are not what we are actually hearing in our room, due to limitations of the measurement microphone, and the “filtering” performed by our brain. (Briefly, below the room transition frequency or Schroeder frequency, typically between around 100 and 250 Hz, the room acts as a resonator, and above the Schroeder frequency, as a reflector and diffusor of sound.)
This not-so-little gremlin – the difference between what the measuring mic “hears” and what the ears and brain hear – is exacerbated by using room correction software, which is designed to smooth out the dips and peaks in frequency response inherent in every room. Often it cannot correct accurately enough for the exact combination of on-axis and the dominating off-axis reflected sounds of your speakers. Surely, though, room correction is supposed to help?
This problem usually arises because the measurement software will normally be programmed to assume a perfectly smooth off-axis response – but this just is not the case for oh-so-many speakers’ responses. This means the corrections made will be based on the software’s own programmed bias of anticipating a smooth overall response, and not on what you are actually hearing – the sum of all the reflected and direct sounds. The software cannot tell the difference between the direct sound and off-axis reflected sound. As a result, the latter negatively affects the direct sound when the measurement software “corrects” for the in-room response. So if you do use room correction software, the smoother your speakers’ off-axis response, the better.
As many speakers do not have a smooth off-axis response, what this tells us, as far as the integrity of the original sound from the speaker is concerned, is that its directivity can actually be more important than the on-axis frequency response itself. Or to put it another way, if you aim your speakers on-axis directly at the listening position, this will help to control all the in-room reflections that arise from the off-axis response, that would otherwise dominate more than they should. If you can improve the speaker’s directivity you focus the on-axis response at the listening position and partially control first reflections.
Changing the amount of toe-in (the angle at which the speakers are aimed at the listening position) is an easy way to reduce the effect of room reflections. In particular, toeing in some models of older speakers can be really helpful in reducing their traditionally poorer off-axis response, because you are helping to reduce the first reflections off the side walls and other surfaces. This too, is another reason why bringing the speakers further into the room can aid our cause. Experiment with this before adjusting your EQ. (I know it’s not possible to do this in every room or living situation, but if you’re able to move your speakers further into the room it’s worth a try – unless you’ve already spent the time and have placed them in the optimum location!)
When making adjustments, pay close attention to what the changes in speaker placement are actually doing to the resultant sound. Let your ears be the final judge. A typical issue may be that you wind up getting more top end in a selected frequency range – and then you find it fatiguing after a long listen. Or perhaps the opposite: you may intentionally curb some of higher frequencies, which might sound pleasing at first, and after listening for a while, realize you have scooped out too much definition. But before you take your measurements and try to compensate for an overtly boxy sounding midrange or toppy high end, consider the following thoughts.
Narrow-directivity speakers (those with a tightly-focused dispersion pattern, also sometimes referred to as controlled dispersion speakers) can ameliorate this issue to a much greater extent. This type of speaker may be so effective in this regard that you can eliminate the need for sound-absorption panels on your wall altogether. Toeing in your speakers in partially copies the effect of narrow-dispersion speakers and causes what you’re hearing from the off-axis responses to be less powerful, resulting in less “harsh” reflected sounds. Examples of narrow-directivity speakers would be most horn loudspeakers, or large-panel speakers like Quad ESLs.
Some speakers are designed not to be toed in, so check your manual for specific instructions. If this is the case, you may have invested in speakers with more of an off-axis volume drop-off, a characteristic usually true of narrower dispersion speakers, thus minimizing the prominence of first reflections. It is of course entirely personal what one listener enjoys compared to another, and you may prefer, for example, the sound of your beloved dipoles because of their own unique characteristics.
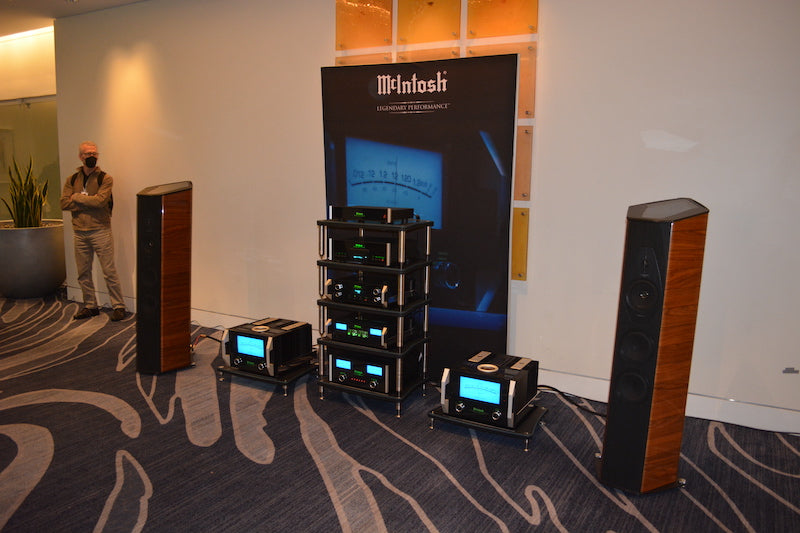
The degree of speaker toe-in is critical to achieve best imaging and spaciousness, as this McIntosh display at AXPONA 2022 demonstrates. Courtesy of Frank Doris.
Dr. Floyd Toole stated this about the listening preferences of speaker designer Siegfried Linkwitz: “Siegfried Linkwitz, a significant contributor to audio, has exorcised the demons of stereo reproduction for years, and currently listens in a relatively reflective room fitted with multidirectional (dipole), or widely-dispersing monopole loudspeakers. Each is apparently able to deliver similarly good stereo sound and soundstages. He concludes that ‘monitor and consumer loudspeakers must exhibit close to constant directivity at all frequencies in order to obtain optimal results for recording and rendering.” (www.linkwitzlab.com, “Stereo Recording and Rendering 101.”) Because this is not the normal circumstance, recordings are highly variable, and he concludes, “The aural scene is ultimately limited by the recording.” For more information, click here for a link to an article Dr. Toole wrote for Audioholics.
With all this said, you don’t want a completely “dead” room with no sound reflection whatsoever (as anyone who has walked into an anechoic chamber can attest). Using reflection, diffusion and absorption to achieve a natural, balanced sound is advice we often hear, but what sounds best in our attempt to make the room sound bigger? All recording studios where the music is made vary, but are usually bigger than very small rooms.
Absorption converts the absorbed audio power/energy to heat, and so some small amount of audio signal power is lost. By contrast, diffusion maintains the overall amount of sound power energy, but instead it is broken down into smaller (and quieter) “parcels” of sound and dissipated throughout the room. Significantly, with diffusion you are not losing sound energy to heat as with absorption and so it retains some key reverberant spatial cues and may contribute to a more pleasing and “live” sound, as opposed to the jarring sound of unwanted first reflections. If you absorb or remove too much reverb, the sound becomes so dead, or at least so un-lifelike, that your poor stereo speakers have no chance of emulating the illusion of hearing live music, or where each instrument influenced the room’s reverb quality.
Keep in mind that there’s a wide variety of difference in absorber designs, and not all work purely as absorption panels. Some also reflect some of the sound waves. Part of the “deadness” that results from using some types of sound absorption is that they only reduce higher frequencies, so the spectrum of the reflections has less high-frequency energy, making the overall tonality you hear more “dull.” On the other hand, some absorptive materials have a thin “skin” to reflect high frequencies but absorb some midrange. Not all absorptive materials are alike.
What room treatments should you consider, and what are some the best locations for them when battling a particularly small room? This is by no means exhaustive, but may help you to address some of the common issues encountered. (Again, we talked about how to deal with a room’s side wall first reflection points in the previous installment.)
If you have a very small room and your speakers are either by design or necessity have to be placed close to the front wall (the wall you are looking at when listening to music, but sometimes confusingly is also referred to as the back wall) then treating the area behind the speakers and up to about three feet of the side walls near the speakers can be greatly advantageous. By adding absorption at these locations, you will help to reduce the effects of comb filtering (cancellation at various frequencies that happens because of sound arriving at different times; the measurement graph looks like a comb, hence the name) and unwanted bass reinforcement which will degrade the integrity of the bass.
Depending on your room – let’s say it is typically small, and the wall behind your head is six feet away – then some diffusion on that wall serves the purpose of making the room sound bigger than it is. If you have a really long room, you may find that using some absorption serves to help improve the room’s overall frequency response curve.
What if your listening position is very close to the wall behind your head? This is not ideal from a listening perspective, because your head is going to be subjected to the back wall’s reflections while receiving the direct source at the same time, making for an inaccurate and maybe even unpleasant bass listening experience. If this is your situation, pull your seat forward if you can, and try adding absorption on that back wall to take these first reflections down in volume. One caveat is that absorption doesn’t absorb all frequencies equally and so a compromise is inevitable. Adding some bass traps to the back corners of the room can help out further. Diffusion right up against your head is not your friend here.
Speaking of friends, this is where they may prove particularly useful for helping you drill down to eliminate your room’s inequities. If you have your willing assistant stand where your speakers are, and clap, or smack two small blocks of wood together, you can then listen for where the most noticeable reverberant slap comes from. If you don’t have anyone to assist you, blow up balloons where your speakers are and pop them with a pin on a long stick and listen accordingly for the pop. Where you hear it come from is where your absorber panels may be best-placed.

Clapping hands together is a time-honored way to listen for a room’s reverb and echo characteristics. Courtesy of Pexels.com/Andres Ayrton.
In the next installment, we’ll look at some limitations of trying to emulate the recording studio at home, and also, how you may further treat your room, if in fact you may not already have sufficient “treatment” already.
Header image: Pure Audio Project loudspeakers at the New York Audio Show 2022. Courtesy of Tom Methans.
0 comments