In issue 137, Russ discussed the advantages a subwoofer or multiple subwoofers can bring to an audio system. The series continues here.
Perhaps one of the barriers of entry for managing the bass in your audio system is that the target goal is to produce an in-room bass response which does not produce an overtly bassy sound. How do you craft that sound if the end result is somehow “inaudible?” Is there some kind of magic trick going on that only a select few sound engineers have access to and knowledge of? Take heart – good bass is not that elusive a beast to track down. It may sometimes seem to be a bit of a moving target, though, so if you have ever attempted to improve your low end, got only so far along the journey and then became frustrated and given up, read on.
In our previous article, Sub Missive, we mentioned many of the practical attributes a powered subwoofer can offer. Generally speaking, in the same way that a floorstanding tower speaker will give you better bass extension than a bookshelf model, so too a powered sub can give you superior-quality bass extension and importantly, more control over what the bass is doing in your room. When your system’s bass response reaches more of its potential, as a result of changing some basic settings, the music can be transformed.
Added to this is the reality that many tower speakers (but not all), simply do not reach their stated nominal bass frequency. Even if they do, a powered sub may provide a more efficient delivery of power than the shared power being distributed between your towers’ tweeters, midrange and bass drivers. Using a powered sub or subs is like the bass being a pilot of a plane who tells it what to do and where to go, avoiding some of the turbulence, lulls, detours, delays and bumps along the way. Our desire is to take control of our bass and have a smooth flight.
What are some of the ways to achieve this? They include the position of the subwoofer itself in the room (or subwoofers – numerous studies have pointed out the advantages of using multiple subs, though space and/or budget limitations may preclude this), its crossover frequency, its phase setting and of course its gain (volume) setting. There are other factors of course, not the least of which is the effect of the room itself and its areas of bass cancellation and reinforcement, but in my humble experience, these adjustments can make significant differences when correctly set – particularly whether the phase switch is set to “0” or “180.” (Some subwoofers include a continuously-variable phase control, but a 0/180 switch is most common. Also, technically phase is dependent on frequency, but for the purposes of this article we’ll consider “phase” to be the proper subwoofer setting for your room.)

If you want a quick fix and can’t be bothered to faff around, try the following: Put your subwoofer in the corner of the room, set the crossover frequency to 80 Hz, adjust the phase until the sub sounds its loudest and then finally dial the gain setting to taste. Done. Dusted. Move on and play your tunes. Happy days.
There is however, more to refining subwoofer performance than meets the eye. Quite literally in fact. Here are some examples. It can be very difficult to know the proper phase setting without taking a room measurement, which can reveal where the bass frequencies are dipping out or peaking at undesirable points on the frequency spectrum. Your sub(s) may be better placed at a quarter of the room’s length or width rather than in the corner, perhaps even closer to your seated position.
Conventional wisdom states that the crossover point on the subwoofer should be set to around where the bass response of the main speakers rolls off. However, you might be better served by your sub by setting its crossover frequency to 100 Hz rather than a lower setting, relieving your towers of some of their bass load as they hand off that signal range and below to the sub. This frees up more available amplifier power for midrange and treble frequency reproduction, with less strain on the amplifier(s).
It’s great to give your towers more headroom; however, when the crossover frequency is set to 100 Hz, the sub can start to sound more localized, which is not what you want for a smooth and integrated sound. You don’t want to be able to turn your head, point your finger and say, “That’s where the bass is coming from.” Rather, you want to a more even bass response throughout the room.
What tools can help us in setting up or subwoofers and speakers, without having to rely on just our ears? Enter REW Room EQ Wizard. It’s free software, readily available as a download which can be quickly installed on your computer. Room EQ Wizard offers a variety of useful analytical tools. You will need a calibration microphone, and these are readily available and inexpensive. The Dayton Audio UMM-6 USB measurement microphone is available for around $100 or less. It comes an individual calibration file which you can load into REW. Once you connect your computer to your audio system, you can take measurements which show you what is going on with the frequency response in your room, and pinpoint in-room peaks and dips.


Adjusting the subwoofer phase response in REW Room EQ Wizard. The better result is with the phase at 0 degrees, indicated by the waveform in blue. The waveform in orange shows the phase set at 180 degrees.
One of the great tools in Room EQ Wizard is the room simulator. If you have never used it, you may be surprised at how informative it can be, particularly when positioning a subwoofer in conjunction with stereo speakers. (For more on Room EQ Wizard, see Adrian Wu’s article in Issue 127.) How is the room simulator different to a straight frequency response measurement? It can save you a lot of experimentation time. For example, you can “virtually” experiment with where on the front wall you may choose to place one or two subwoofers. When you observe the resultant plotted waveforms, you immediately get a visual indication of how the response will respond over time, as opposed to an actually measured response. This is useful in that you can begin to quickly identify many different places in the room that you can see with more confidence would or would not be suitable for sub placement(s) because you see a larger dip in frequency in the problem areas.
Rather than physically moving subs, taking actual measurements and repeating the process many times until you are happy, you can use the simulation software to drill down to a good spot more efficiently, and then fine tune it from there with smaller placement adjustments and actual measurements. Let’s say you may know a sub would generally be well-placed in a corner. Using the simulator, you can start out from that location in the program and compare the response by virtually moving the sub forward or back in small increments from the side and rear wall. Then, try another slightly different position and compare the frequency plots. It’s particularly useful for identifying which corner could be best-suited.
You can enter your room dimensions, seating position and of course the position of your speakers and sub(s). (Up to four subs may be simulated.) Additionally, you can simulate if your speakers and sub are ported or not, what delay settings you may have chosen for your speakers and sub and how much additional gain you may have dialed into them per channel. You can even adjust the crossover frequency settings of each subwoofer independently. The value of this is that you can examine the frequency response of many measurements taken at various positions of your listening chair, and how they change as you alter one parameter at a time, such as where the sub is placed in the room, or the crossover frequency or whatever you choose to alter. When you look at the overlays of your multiple samples of the room’s response, they make it far more obvious as to what’s happening in the room. A great way to see this in action is by using the software to quickly toggle on and off the response of the sub(s) when blended with the speaker’s measured response. In this way you can simulate adding or removing hardware from your system. This in itself is very useful for emulating your desired system before you invest in purchasing more subs.

REW room simulator software. (This image is representational and not indicative of any recommended settings.)
It’s important to remember that this room simulation software is just that – a simulation or illustration of expected results given what data you feed into the fields. Although the room simulator has limitations – it can only represent rectangular or square rooms, and does not accommodate L-shaped rooms or rooms which open out on one side, for example – it does provide some good bearings by giving a sense of what is going on in your room, and the magnitude of the adjustments you make. This is particularly true if you take multiple measurements from different locations in the room. That said, your ears are extremely sophisticated listening devices, more so than a humble omni-directional measurement. And our brains can powerfully decipher reflections, delays and room modes. But the REW software is excellent at illustrating and pinpointing peaks, dips and problem areas which we may or more likely may not be able to determine purely by listening for them.
Our goal is to position our sub (In the case of a single subwoofer) where the resultant in-room frequency response at the listening position or positions is as smooth as possible. By spending some time and by simply adjusting the subwoofer’s position in the Room EQ Wizard simulator alone, you will be able to quickly determine which places would or would not be worth testing before actually physically moving the subwoofer around.
If there is a large dip to be found, it’s far better to position the sub where that effect is less-pronounced or non-existent than to try and get rid of that trough with the application of digital EQ using, say, the room correction software of an A/V receiver.
By experimenting with speaker positions in the simulator, you start to see how good your speaker and sub integration are with each other. Also, if you are using multiple subs, you’ll see if you are in fact producing worse spatial variation in your signal because of their improper placement. Once your integration of the subwoofers with the main speakers is as smooth as possible, it’s almost as if the bass becomes “subliminal” in the sense that it’s not disconnected from the rest of the frequency range, yet it will be powerful and present.
In a following article, we will look at some specifics for placing multiple subwoofers, and at some of the other factors which contribute to sublime sound.
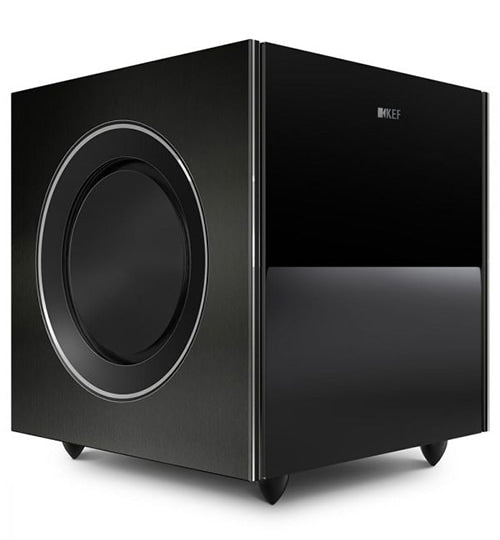
Header image: KEF Reference 8b subwoofer. From the KEF website.