


In Part One (Issue 166), we briefly covered some of the highlights of the Yamaha Web Editor SetUp online utility, which is designed to get the best sonic performance from an Yamaha A/V receiver. In this last installment we will look at the advantages of the latest version of Yamaha’s higher-end AVENTAGE A/V receiver firmware, and also how you can get the best if you have an older software version.
In particular, let’s look at editing the PEQ, or Parametric EQ, settings via the drop-down menus. The degree of functionality and control provided by a precise parametric EQ program is a very useful and powerful way of managing the problem frequencies and dips and peaks in your room’s frequency response. (See my articles in Issue 158 and Issue 159 for additional information.) Software such as REW Room EQ Wizard is extremely useful in measuring your room’s behavior. The results obtained from a program like REW can then be used to enter parameters into the Web Editor SetUp menus, or a similar online setup program for other A/V receiver brands.
One of the advantages of Yamaha’s Web Editor SetUp is that you can make adjustments to your system without having to be in the listening room (or one of the multi-room zones if the receiver has multiroom audio capability). The adjustments are executed in real time, so, on the other hand, if you are in the listening room you can immediately hear any changes you make. You may then save your settings.
What’s new with the latest Web Editor SetUp version compared to the older one? Significantly, you may select from more PEQ frequency ranges for even more precise fine-tuning. There is a new skin for the interface, which is easier to read and navigate, with larger fields and “sliders” for data entry. (At the time of this writing there’s, no way to minimize the fields that are of no interest to you, such as for channels of speakers that you do not have connected, so you have to scroll down to the elements you want to edit. This may be updated in a future firmware update but is a minor point compared to the abundance of controls and ease of editing provided.)

Yamaha Web Editor SetUp, screen shot of parametric EQ (PEQ) menu.
The software was developed primarily for sound installation engineers and system integrators. Having said this, it’s so easy to use and to hear the results of the sonic adjustments, that I encourage anyone who has a compatible Yamaha receiver, or other receiver brand that allows system setup via the web, to try it. Just remember to turn on your receiver first, because you can access the online editor app even if the receiver itself is turned off. Also, make sure you are on the same network as your receiver.
Although some users may prefer the visualization provided by the on-screen plotted graphical display, which is excellent, the power of the Web Editor SetUp app in fine-tuning specific problem frequencies may yield far more precise results than the standard on-screen menu can provide. Note that REW (or perhaps a similar program) most likely will provide far more precise measurements than you’ll be able to adjust for in Web Editor SetUp, but you can get very close. So close, that the edits made would likely be more than granular enough to effect changes far more subtle than you could audibly discern by the time you take Q factor, dB and frequency at any chosen bandwidth into account. It is that refined.
In fact, REW offers even more detail than you should perhaps implement. Why? You may not be able to even hear the differences in frequency response between very close frequencies. The temptation can be to adjust for tiny peaks and dips that are masked by the overall sound being output, but which would make no real-world audible difference.
Please also remember that these measurements are made with a microphone and not human ears, which play a huge factor in what is seen on a measurement graph compared to what we are actually hearing. Also, the microphone may not be picking up frequencies above 20 kHz that are in fact being output by the tweeter. As a result, if you try to adjust for “flat” high-frequency response as indicated by the measurements, you may wind up frying your tweeter. Conversely, trying to boost weak or nonexistent low-bass frequencies may put too much demand on the woofers’ and subwoofer’s driver excursion, or the ability of the power amplifier(s), to deliver enough output.
There are also limitations with the Web Editor SetUp app itself. You can’t select whichever frequency you want to edit, as with parametric EQs for recording studio use – there is a fixed selection of EQ points available. That said, the app offers a higher than ever degree of granular control and a better ability to zero in on problem frequencies. It will likely be far more than adequate for your requirements. How so? The newest firmware provides adjustment from as low as 15.6 Hz, for more-complete bass management. As an example of the surgical precision the app affords, you may now may adjust frequencies at 15.6 Hz, 16.6 Hz, 17.7 Hz, 18.6 Hz, 19.7 Hz, 20.9 Hz, 22.1 Hz (and upward).
Even the older version of the app offers 28 dedicated frequency bandwidths at one-third octave intervals, with control over the Q (the ratio of the center frequency to the bandwidth) starting at 31.3 Hz.
In addition, if you select the “Low Frequency” drop-down menu on the far right of the page under the PEQ menu, you now are presented with a real-time visual display of up to seven bandwidth edits. This means you may now see what you are doing in the online editor App without being obligated to switch to use your TV to view the edits as made through the receiver directly. Previously, this was the only way you could “see” your edits plotted. Now it’s in the online setup, which is much easier and intuitive.
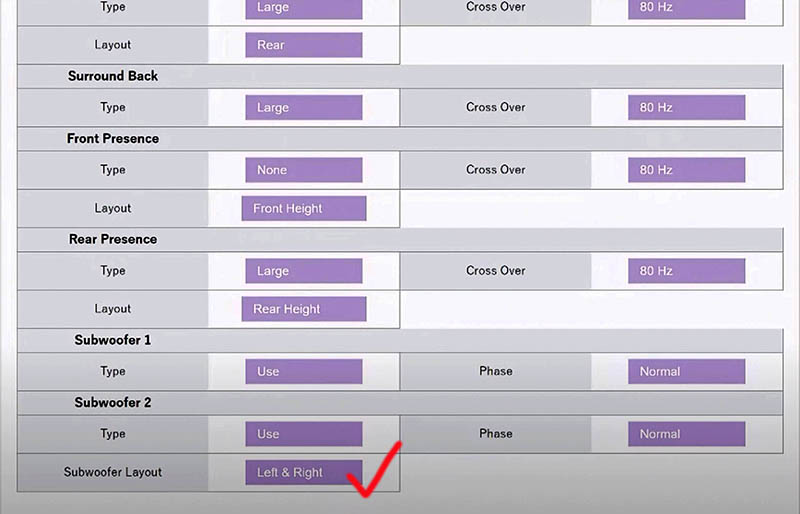
Yamaha Web Editor SetUp, screen shot of speaker setup and bass management menu.
With the ability to adjust bass frequencies so finely, pay close attention to how much of a perceived difference you actually notice at 20 Hz, for example, given the bandwidth control you of the Q factor. The Q adjustment has the ability to cover a greater than 2-octave range (Q of.500) down to just a little more than one-eighth of an octave (Q of 10.080). Pinpoint accuracy aside, how much difference can you honestly hear? Getting it technically more accurate does offer a certain satisfaction and peace of mind though. What you certainly don’t want to do is make so many narrow bandwidth adjustments that you end up with a less-smooth waveform!
Our goal should be to make adjustments that are meaningful, but more importantly –perceivable.
There are some other caveats of making multiple adjustments to achieve the supposed holy grail of a completely flat in-room response. One is that more noise can be introduced into the system because of signal degradation and the fact that more amplifier power is required. This may be one reason why Yamaha limits you to seven bandwidths which are editable per speaker channel.
Header image: Yamaha AVENTAGE RZ-A780 A/V receiver.
0 comments