Loading...

Issue 17

Issue 17

Issue 17

Leebs

As we approach the annual Rocky Mountain Audio Fest, our home-town show (sorta), we have a lot yet to accomplish. In this issue I take a not-so-cynical look at the show in The Audio Cynic;  by the time you read this issue, the show will have come and gone, most folks will have made their way home, and we will probably have collapsed in a heap from exhaustion.

Next issue there will be tales to tell, pictures to share, maybe even a video or two.

Speaking of video---there aren’t any videos from me in this issue, but you can expect to see more of them in future issues. Before I traveled to NY and NJ recently, Mentor/Publisher Paul McGowan encouraged me to visit a number of our colleagues in the industry, and shoot video. Being a good Mentee/Editor, I did so.

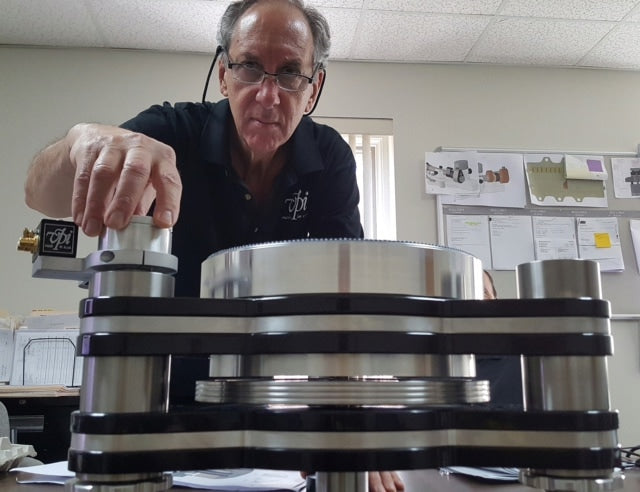
You’ll see a few pics from my visit to VPI in this installment of Vintage Whine, and I did extensive video interviews with both Harry and Mat Weisfeld, and toured their factory and listening labs. To say that Harry’s collection of vintage gear is astounding, is to understate the case.

John DeVore was kind enough to invite me to the DeVore Fidelity facilities in the Brooklyn Navy Yard, and in the video I shot,  you’ll see the infamous Monkeyhaus, along with some of John’s secret projects.

In this issue’s My Turn, you’ll get a look at the impressive new factory of our Colorado neighbor, Boulder Amplifiers. As you can imagine, it takes a lot of work to turn out those massive, sculptural amps!

Our regular contributors continue to work their magic: Richard Murison concludes his series on Sigma/Delta ModulatorsLarry Schenbeck flagellates flageolets and other types of flutesPaul McGowan takes a basic look at subwoofers, and Jim Smith continues his in-depth look at them in Subwoofery.  Dan Schwartz gets past Tuesday Night Music Club, and moves on to Thud.  Darren Myers continues with his series on How to Make a Vintage Component Sing Again---THE SEQUEL!.   Duncan Taylor writes about his adventures with acronyms and with recording couples. Our resident bard WL Woodward is taking a break this issue.

See you in a couple of weeks with the news from RMAF!

Cheers, Leebs


How to Make a Vintage Component Sing Again, Part II

Darren Myers

Part II: The coupling capacitors

In the last issue, we discussed some basic theory concerning power supply capacitor replacement in vintage audio gear. I explained that the condition of these capacitors is essential in maintaining performance and reliability. While capacitors used in the power supply can and do influence the sound, they are not nearly as critical compared to when they are used in an application known as signal coupling.

What are coupling capacitors and why are they such a critical factor when it comes to the sound of a component? How do you know when it’s time to replace them? How do you locate them and choose replacements or upgrades?  In this article, I’ll answer these questions and walk you through the process of locating and replacing these critical components.

What’s a coupling capacitor?

Coupling capacitors are capacitors used directly in series with the signal path. All musical information that you hear out of the speakers has to travel through them. But why would audio designers place capacitors in the signal path at a risk of compromising the fidelity of our precious music?

In order to understand this, we must look at some basic properties of capacitors. In an ideal world, a capacitor acts like a wire (short circuit) when passing alternating current and a cut wire (an open circuit) for direct current. AC is alternating, meaning that it goes from positive to negative at a given frequency, and DC doesn’t have a frequency at all (0Hz). The important thing to catch here is that music is an AC signal. Ideally, a capacitor should pass all musical signals but block DC from passing.  

This is precisely the purpose of a coupling capacitor.

In many amplifiers, the designer has used coupling in order to separately control the DC bias of each gain stage.  The isolation between each amplifier results in zero DC offset from the last stage being fed into the next.

Another application is for input protection. For example, imagine an amp with a gain of 30 that has no DC blocking throughout its signal path, and is connected to a pair of speakers. If a preamp upstream becomes faulty and outputs 1V DC on the amp’s input, 30V DC will appear across the terminals of the speaker.  This level of DC has the potential to fry woofer voice coils.

Don’t ask me how I know that.

Finally, many preamps that use a single output device running in class A use coupling caps on the output.  The DC voltage that’s present due to the idle biasing conditions must be blocked and only pass the audio signal.  For instance, most preamps that use vacuum tubes as the output device have an output coupling capacitor.

What determines the value and type of a coupling capacitor?

The circuit A shown in the figure below is an example of a coupling capacitor that is used on the input of a simple transistor voltage gain stage. The circuit can be simplified by modeling the input impedance of the amplifier with a single resistor. The resulting circuit on the right forms what is called a high pass filter.

A high pass filter is exactly what it sounds like; a filter that attenuates low frequencies and passes the high frequencies. The cutoff frequency in which there is a 3db attenuation of low frequencies is found by fc = 1/(2*pi*RC). Since we want to avoid phase distortion and attenuation of the lower frequencies, we want this cutoff frequency to be as close to DC as possible.

For example, if the input impedance to the stage is 100 KOhms and the input capacitor is 2uF, the product of R and C would equal .2 seconds. Plugging the RC product into the cutoff frequency equations tells us that at .8 Hz, bass frequencies will be rolled off by 3dB.  Since we know that the human ear can only hear down to 20 Hz, this cutoff frequency would be adequate to hear the lowest notes in music without attenuation.

In many older designs, the only capacitor type that was practical given the cost, space, and value were electrolytic types.  As we discussed in the previous issue, electrolytics degrade over time by changing value and increasing parasitic properties.  As the value drops, the cutoff frequency goes up, rolling off the bass frequencies and introducing phase distortion within the audio band.

Although electrolytics were prevalent in older designs, they are not the only capacitor type that you will find. Even today, many high-end designs use plastic film capacitors as coupling capacitors.  Film capacitors are superior to electrolytics and as a result sound much more transparent.  Unfortunately, not all designs use these due to their cost, size, and lack of high capacitance values.

How do you know when it’s time to replace the coupling capacitors?

In the case of electrolytics, many environmental factors determine the lifetime of the component.  These factors can range from the temperature at which the capacitor was operating at to the amount of voltage that was applied to it.  Electrolytics as new as 10 years old can start to show symptoms of aging. If your component is 10-20 years old and you are suspicious that the sound quality has diminished, the coupling caps are likely the first place to look. If it’s older than 20 years, I wouldn’t even hesitate.

Plastic film capacitors are a different story. For the most part, they do not display dramatic symptoms of aging.  Despite this, there are several reasons why I would recommend still changing older films.

Firstly, it gives you a chance to “upgrade” the component and purchase a better capacitor that perhaps the manufacture couldn’t afford to include in the original design. Cap technology has also advanced over the years and it’s likely that modern capacitors will sound better than their older counterparts.

The final motivating factor is an exciting one.  Changing capacitors allows one to tune a component to his or her subjective preferences.  Many favor doing this instead of constantly changing amps or preamps in hopes to just blindly stumble across something that works for them. Those who master this have some of the most synergetic and cohesive systems that I’ve heard…and they’re having fun doing it!

How do you identify signal path capacitors and choose replacements?

Similar to when we discussed changing the power supply capacitors in part 1, the first step is to acquire the schematic to the component you are working on.  Below is a typical signal path of an older solid-state gain stage.

The input of the amplifier is notated on the left with a 1.  Following the signal path from the left to the right, it’s clear that C3 is in series with the input. This is our input coupling capacitor. Noticing that the value here is very low, I would highly suggest to use a plastic film capacitor in this location best sound quality.

Following the remaining of the signal path which is highlighted by the bolder line, we discover C9. C9 is the output capacitor to this stage. It being 10uF’s limits us because it’s unlikely that a film of this value would fit on the PCB. For this reason, an electrolytic from Elna, Panasonic, or Nichicon will do the trick. Similar to the power supply caps, increasing the voltage rating so that it fits the PCB footprint is completely fine.

Here’s a little tip: you can help reduce the coloration that C9 inflicts on the sound by bypassing it with a small film cap (.1-.47uF).  Tack the film under the PCB so that it’s in parallel with the electrolytic. Experiment with different types and see what you prefer.

If you noticed, we forgot about two other capacitors. These caps are actually not being used for a signal coupling application.  Instead, C11 is used as what is called an emitter bypass capacitor. This capacitor allows the designer to DC bias the stage without compromising the AC gain of the amplifier.  If this capacitor decreases in value it will cause degeneration at lower frequency, which in turn will roll off bass frequencies. For this reason, we also want to replace this capacitor.

The final capacitor, C7, is what is referred to as a feedback compensation capacitor. These are indeed very audible and the low value gives us plenty of options. I recommend a high quality plastic film type such as polypropylene, polystyrene, or silver mica.  Never change this capacitance value as it was selected by the designer to optimize the stability and high frequency distortion performance of the amplifier.

As for the type, it’s for you and your ears to decide. That is what’s beautiful and exciting about DIY.

Warning!

I am sure you have heard the dangers of working on electronics.  My advice to you is to read up on how to be safe when working on equipment. While working inside of electronics, always treat everything like it has the potential to kill you. Make sure the AC cord is unplugged and discharge all power supply capacitors before you start working. This reinforces correct habits and may very well save your life.

If not clearly marked, always notate the correct polarities on the PCB before removing any electrolytic capacitors. If electrolytics are reversed, they could explode and cause severe injury. Please be cautious!

Below are links to information to learn about proper safety practices.

Safety links:

  •         General Safety Information:

http://www.diyaudio.com/forums/showwiki.php?titleIYSafety

  •         How to discharge a capacitor:

                        http://www.learningaboutelectronics.com/Articles/How-to-discharge-a-capacitor

  •         How to make a capacitor discharge tool:

                        https://www.ifixit.com/Guide/Constructing+a+Capacitor+Discharge+Tool/2177

Links to popular capacitor vendors:

Capacitor reviews:

http://www.humblehomemadehifi.com/Cap.html

http://www.laventure.net/tourist/caps.htm


The Sound Your Head Makes When It Hits the Table

Dan Schwartz

Enough about the Sheryl Crow record. Well, no — but yes. I could probably write quite a bit more about it, and the conflicts around it, but it was very long time ago. I deem it time to move on to an album that is inseparable in my mind and experience: Thud.

The latter part of ‘93 was taken by up talking about it, mixing it, and being berated over it. It’s Kevin Gilbert’s solo album, recorded over a few years, including the time that we put in on Sheryl’s album. I’m only on 4 or 5 of the tracks (I think) but have some experience of the whole thing.

I first became aware of Kevin working on putting something together when he asked me to come to his studio (he sublet about a third of Bill Bottrell’s place) and record a bass part on “When You Give Your Love to Me” — this was originally a song of Bill’s that he gave to Kevin, who complicated the lyrics somewhat from Bill’s version, which was more pop. I have some decent memory of this, despite it being 24 years ago. I played my graphite-necked MusicMan bass direct through my Alembic F-2B preamp. It was pretty easy, but some time later, when Jim Keltner heard it, he remarked that it was obvious that Brian MacLeod and I had played it together — despite the fact that I had overdubbed the bass to the drums that Brian had recorded months before.  Small victories, you know? I hung around after I put down the bass to help Kevin put the acoustic guitar on the track, but the vocals are really the big thing on that song.

I wrote a bit about “Joytown” last month; a song he called “Shrug” was originally a Tuesday Night Music Club song called “My New God”, which had its origins in a thing Sheryl said. I had done an overdub the night before, I think maybe on “The Na-Na Song”, a bit of nonsense from the record we were making for her. I came in a little late the next night and she said,  “Dan — my new god.” And we were off. Little things like that can trigger a song. But it never quite came into focus, so Kevin “disappeared “ the tape, changed lyrics and the tile, but kept the melody.

There are two songs on Thud that are bookends of the same subject: “Tears of Audrey”, and “Song For a Dead Friend”. “Tears of Audrey” was very much a collaboration in the production, all of us working very much as equals, TNMC-style, on the realization. My bass was a 1970 Guild M-85, a unique, deep, hollow-body bass, played with a pick, and direct I think. It was done, unlike most of the album, without second-guessing and very fast, maybe a day, maybe two. “Audrey” is a song about the mother of a friend who had committed suicide — the subject of “Song for a Dead Friend”, Danny. A bit more about that song in a minute.

When it came time to mix the album, Kevin didn’t want to do it, and prevailed on Bill to mix it, but Bill wanted me mixing with him. Bill was perfectly capable of mixing it by himself, but with KG in the room, I think he wanted me there to diffuse the energy. So Kevin, with the money his “label” had given him, rented my 1” 2-track, and we went over to Andorra for the mix. This turned out to be a very good idea. Bill and Kevin knew the board at Andorra — it was the same automated Neve 8078 that they had done Toy Matinee on when the owner was at Smoketree Ranch, and Kevin’s multi-tracks were so complicated that there was no way for Bill to do a mix in his preferred, very simple style — it had to be automated. A passage might last 4 bars on a track, and immediately the same track had a completely different event.

We worked for about ten days, and then Bill announced that he was going to Japan the next day to be a judge in the Yamaha band contest. So we were on our own. Here’s how I remember it going: before going into work, my almost-wife and I went to see Betty Bottrell’s obstetrician — our wedding was about 3 months off. But we needed to have something checked. And then Kevin and I set to work mixing “Song For a Dead Friend.” In a few hours, the call came — we were having a baby.

I tried for some hours to concentrate on the mix, but I was literally hallucinating. I was looking at the board and kept seeing the hallways in the hospitals were my parents had died; I suppose because here was solid proof of my own mortality, of my being one in a line. Kevin and I were, not so much arguing, as me slowly wearing him down. The multi-track was, in true KG style, filled up; lots of instruments doing lots of stuff. The song that was gradually taking shape in my ears had just about nothing in it. In the early evening, I had vocals, piano, and a haunting electric guitar, and that was it. I said to him, “Just put this to tape,” and I left to confront my mortality and celebrate with my fiancée.

And that’s where our work ended (though not without my having to endure a drunken Kevin haranguing me for 90 minutes in his car one night about why Sheryl didn’t have to write me a check when he did). In the end, he didn’t use the mixes, probably because he didn’t want to pay Bill and me for our work. He remixed the whole album, and, unable to live with a mix that didn’t use most of the instruments he’d recorded, he re-recorded “Song For a Dead Friend” exactly as I’d conceived of and mixed it.

When it was released (a term that used to have some meaning to it), he told me that he thought that the mastering cut off everything below 100 Hz. Maybe. But — I still have a couple of the 1” mixes (including the notorious “Song…”) and, of course, I still have my machine.


Montana Audio

Montana Audio

Montana Audio

Paul McGowan

To start off my system is nothing brand new.  It is all older equipment,  like my Montana Audio XP1 loudspeakers, but the build quality of everything is top notch and it sounds great. 

IMR-1

About 3 years ago due to circumstances happening I had to put my system in storage due to moving.  I ended up in Norman, Oklahoma and after finding a permanent place to live and not much room to set up my stereo I thought I would have to sell the whole system which I really didn’t want to do.  I set it up with the intent if just making sure everything was in working order. 

Well, after turning it back on I remembered why I have it and remembered how much joy listening brings to me so selling was now out of the question. My listening room is not optimal by any means but this equipment that Perter Noerbaek has built seems to sound awesome anywhere and still projects an amazing sound stage. Any music I play through it just sounds right. 

I listen to a lot of Jazz music.   Some of it tends to be more on the smooth jazz side such as Spryo Gyra and The Rippingrtons although Miles Davis, Dave Brubeck, Stanley Clarke, Gerald Veasley, Lee Ritenour are some more of my favorites. 

IMR-2

I went through high school listening to Classical Music so that is also a genre I am comfortable with, and of course, I am a classic rock and blues fan. The bottom line is I am a true 2 channel hi-fi geek.

I know not too many of us are left but I will always be one.


Subwoofery: Smooth Operator?

Jim Smith

Our last entry ended with this statement – “No matter how excellent the subs, no matter how much effort went into their placement, the results will never be satisfying if the following process (which has nothing to do with working with the subs) isn’t performed.

“The main speakers need to be voiced for the smoothest bass possible! Great subs will have little or no chance of blending with main speakers that have problems in the 25-250 Hz area. Please understand – I am NOT saying that the main speakers are problematic in the bass. Most likely they are performing well. It’s the room/listening position/speaker position that is the culprit. When attention to this vital detail has been properly applied (plus two more issues we will explore as well), only then can we begin to think about working with the subs.”

For our purposes in tuning our main speakers to our room, best bass is NOT the deepest, but the smoothest.  We want to minimize peaks (which mask the true difference in recorded dynamics) and bass suck-outs (which minimize the true difference in recorded dynamics).

To achieve this foundational aspect of our music, we will be working with the room, rather than fighting it.  Of course, various components have varying dynamic capabilities.  But this is not about evaluating components – it’s about transforming the musical effects of the components that you have now.

Rather than employing electronic adjustment at this point in voicing the system to the room, I tend to think of the process as organic, not electronic.  Therefore, we will not be introducing eq or speaker/room correction at this time.  Our concept is simply to be working with the room/system as it is.

The steps we will take are interrelated.  By far, the most foundational step is finding the best location for your listening seat in your room.  This is the anchor point for everything that follows.  Even if you cannot move your seat permanently due to decorative requirements, I’ve found that it’s nearly always possible to use a temporary location for tuning, and for listening those times when you really want to experience the full musical impact from what you purchased.  Especially once you hear and feel the difference this tuning will make.  I call it tuning, but it is really discovering how your speaker/room interface works and then working with it, rather than against it.

FWIW – I know that there are some so-called high-end audio rules – such as the “rule of thirds”.  But in actual practice, I’ve rarely voiced a system that ended up following these precepts or other “rules”, because – once items are introduced into the room – the math changes (as does the room volume and even the dimensions).

Basically, we will locate the best seating location, establish a grid for our room, and then listen to the musical presentation.  We will be making adjustments to speaker position, toe-in and separation, all the while using our grid to help us get back to and/or improve on our reference position musically.

More often than not, this process can be a bit lengthy.  But not to worry – once it’s done, the music will pour from your system in a much more engaging manner.  So the relatively small amount of time spent can pay dividends for many years of musically rewarding listening.

If you cannot change your seating position for tuning and serious listening, then you can skip ahead.  While the overall results may not be as powerful, they should still be very worthwhile.  However, you should at least read the following section on finding the “anchor” position in your room…

Part 1 – The anchor – establishing your listening position

The negative effects resulting from not addressing this critical issue simply cannot be overstated.  Even so, I am constantly amazed at how many audiophiles, dealers, reviewers and manufacturers miss this fundamental aspect of music reproduction.  When I see them worrying about speaker placement without having done the basic listening position evaluation first, I cringe.  Certainly better speaker placement (including distance away from the listener and from walls; speaker separation; toe-in; etc.) can make a real improvement, but it will not have been as powerful as it could have been had those steps been built on the foundation of finding the best listening position.

Basically, we are concerned about the effects of room resonances in the bass (from 25-250 Hz).  The resonances are related to the room dimensions, and to some extent, the shape of the room, the contents of the room, and even the entryways into the room.  Sometimes referred to as the boundary dependent region (25-250 HZ), resonances in this region may appear as peaks in the response (phase reinforcement) or they may appear as dips (phase cancellation).

Essentially, these peaks & dips in the 25-250 Hz region are part of the sonic signature of the room.  I have never encountered a room, no matter how much money was spent on designing and building it, that didn’t still have sonic irregularities in the boundary dependent region. It behooves the listener to locate a listening area where the room is most neutral in this region.  The ultimate result of ignoring this aspect is reduced musical dynamics (and reduced musical engagement) as I mentioned earlier.

By most neutral listening area, I mean the area in the room where the bass is smoothest, not necessarily the deepest. In other words, resonant peaks are diminished and resonant suck-outs are less deep.

Can equalization help?  Can room correction help?  Maybe.  Can bass traps help?  Probably.  But first, we will look at the organic process, one that you can do without spending money on additional items.

After we complete our examination of the best set-up for our main speakers, we’ll look at the issues that usually contribute to a less than satisfactory sub integration with “Full-range” speakers.

Teaser Hint – here are a few Subwoofery issues that we will cover in upcoming issues, which – IMO – are rarely addressed sufficiently or properly (if at all) by most audiophiles, many dealers, more than a few manufacturers, and all too often – a lot of reviewers:

1 & 2 – Subwoofer location and direction.  Hey, isn’t bass omnidirectional? Why would location and direction matter?

3 – Subwoofer crossover frequency. Frequency & level adjustments can make or break seamless sub/main speaker integration.  And it’s not what you think.

4 – Subwoofer level.  Same as above.

5 – Subwoofer polarity.  What is the effect of this adjustment?  When do you make it?  How do you recognize when it is right?

The above five issues (in bold type) will dramatically effect the performance of any sub-woofered system. That’s because they are completely interrelated. IMO, if only one of these is ignored or inadequately addressed, there is little chance that you will get optimum results. In fact, this is one of the areas where reports of “slow” woofers and/or “poor blending” occur, thereby assigning blame for the less-than-satisfying results on the innocent subwoofer…

Uh-oh, that reminds me that I should have introduced another topic earlier in this series. 🙁

For now, I’ll just mention it:  I would far rather have no subwoofer than have to use one subwoofer. Or, to put another way, if you can’t have stereo subs, wait until you can.  Don’t compromise your system with just one.

See you next time!

You can read Jim’s work at his website. www.getbettersound.com 


Boulder Amplifiers

Boulder Amplifiers

Boulder Amplifiers

Bill Leebens

Somewhere back in the last century, from around 1976 to 1983, a California company called Pacific Recorders & Engineering (PR&E) designed and built tape cartridge machines for radio stations. One PR&E model, the Tomcat (an acronym for Theory Optimized Microprocessor Controlled Audio Transport, if you can believe that), was said to be more durable and have better  S/N and better sound quality than anything else on the market. Cart machines were used for easy playback of commercial spots, as well as for music.

PR&E branched out into amplifiers, microphone preamps and mixing boards for broadcast and recording applications, and their reputation for high performance and durability spread. Occasionally, audiophiles would stumble upon a PR&E amp, and again, the company’s reputation spread.

As have zillions of Californians before him and since, company head Jeff Nelson relocated to Colorado in 1984. The company was housed in an old farmhouse in Superior, south of Boulder, Colorado, and the company was renamed Boulder Amplifiers.

Soon thereafter, the company’s focus shifted from pro gear to high-performance consumer products. A pro-model amp, the 500, featured the standard pro-style indicators and controls on its front panel. The 500 AE–”Audiophile Edition”—deleted the gewgaws and had only a power switch.

For over 30 years now, Boulder  has designed and built indestructible amps, preamps, and other components. Products feature impressive, heavily-machined casework that is all done in-house, a rarity these days. The impression given by their products is a sense of being built for maximum performance and durability with cost no object.

The company’s new, purpose-built  23,000 square foot facility in Louisville, Colorado will allow the company to pursue even bigger/better/badder projects. It’ll be interesting to see what they come up with!

Special thanks to Rich Maez for the tour.

IMG_9470
Boulder Amplifier's new facilities
IMG_9471
CNC milling machines used to build Boulder Amplifier chassis
IMG_9476
Rich Maez, Director of Sales and Marketing, shows some finished metalwork
IMG_9478
Finished amplifier heat sinks
IMG_9482
The oversized bead-blast chamber where metalwork receives a satin finish
IMG_9486
Assembly area
IMG_9489
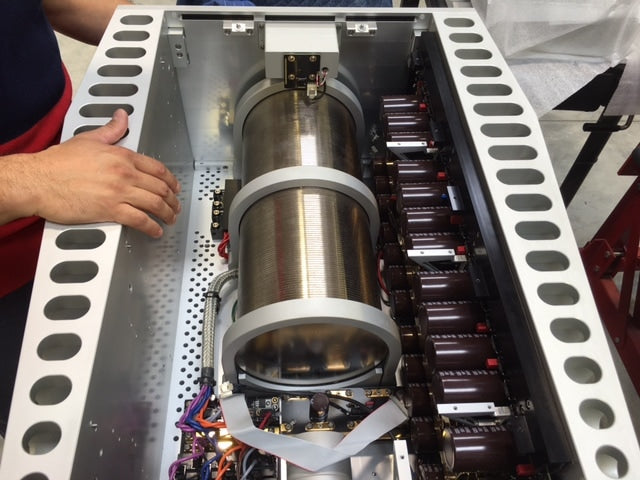
Massive 3060 amp on the engine stand used for moving the largest models
IMG_9490
Inside the 3060
IMG_9493
Other amplifiers awaiting final assembly and test
IMG_9495
Auto insertion pick and place component machine for PCB assembly
IMG_9496
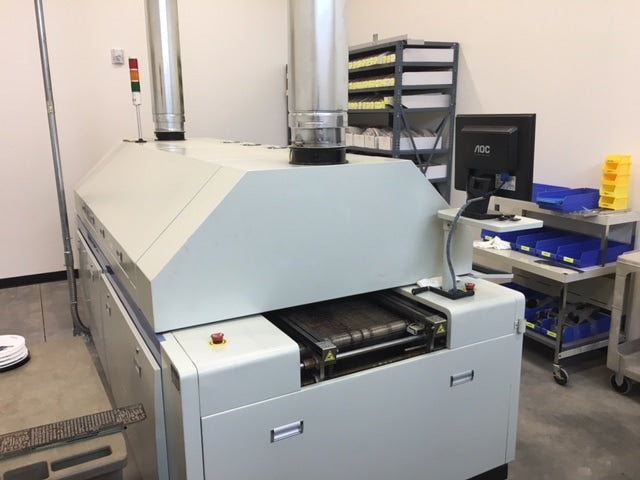
Wave solder machine to solder PC boards

Simple Subwoofer Setup

Paul McGowan

Very few loudspeakers are full range. Yes, nearly all extend higher than we humans can hear, but rarely as low.

Audio setup guru Jim Smith, in his continuing series on Subwoofery, is covering a lot the specific details on why you need a subwoofer and what’s involved in its setup. For the rest of us it’s helpful to start at the beginning, keeping it simple.

Why speakers measure one way and sound another

Though full range loudspeakers may advertise their low frequency response as going down as low as 30Hz or even 20Hz, it is rare they achieve this in your room.

When speaker manufacturers measure the response of their products a microphone is placed a few feet from the speaker (1 meter, to be exact). This close, speakers can produce very low frequencies, but those low notes don’t necessarily reach your listening position—where it counts. So, nearfield measurements of the kind speaker manufacturers rely upon serve marketing and brochures more than listeners. This is one reason most speakers fail to deliver low bass in a typical room.

There are two main reasons for this: too small a woofer to effectively couple the air in your room, and placement. It is to the latter issue we will focus our subwoofer basics column.

Bass reproduces differently in your room

Bass is not consistent within your room. Depending on where your speakers are, compared to where you are, the bass may be very different.  Here’s an experiment you can easily make. Find a track with good bass on it. I like Brian Bromberg’s Wood. It’s an excellent recording and should have deep bass with great presence. As Bromberg is playing, walk around your room and note just how different the strength of bass notes are. Make sure you walk into the corners of the room too. Notice anything? Sure, bass collects up in the corners. You might also notice that in the middle of your room, there’s likely very little bass. Yet, stand near your rear wall, the front wall, the corners, and the bass will be stronger.

Everything we hear is actually sound pressure changes: air pressure that comes in waves. High frequencies have short waves (often measured in increments of an inch) while low frequencies have long waves (often measured in many feet).  A 20Hz bass note is approximately 50 feet long! Air pressure waves of this length bunch up at the boundaries of your room, like walls and corners.

Do you need a subwoofer?

Unless your loudspeaker has a built in subwoofer, chances are excellent your system would benefit from the addition of an aftermarket sub.

Where do you place it?

Our first inclination would be to place the new subwoofer in the same place our existing full range speaker is. That’s typically exactly where you don’t want it to be. And here’s why.

The best place for imaging and mid to high frequency reproduction from a loudspeaker is almost never the best place to make bass. To make matters worse, it’s almost never where you’re sitting, either.

Now that we understand the subwoofer is likely not going to be placed where our speakers are now, the obvious question is, where to place it?

Simple way to place it

Since we know the best bass reproduction in your room is likely not where the speakers are, nor where your listening position is, we have to find the right spot to place our new subwoofer so we get perfect bass in the listening position.

Here’s the trick. Place the subwoofer where your listening chair is, crank up the music, and then walk behind the main loudspeakers until you find where the bass sounds perfect. Bingo!

Now, move the sub into that exact spot, behind the loudspeaker, and when you play music again, bass at your listening position will sound identical.

It’s that easy.


VPI: 38 Years and Counting

VPI: 38 Years and Counting

VPI: 38 Years and Counting

Bill Leebens
Harry Pearson, founder of The Absolute Sound, contributed to the success of a number of high-end audio manufacturers, and probably to the demise of a few, as well. But the only company I know of that Harry helped provoke into existence is VPI. (Don’t ask what “VPI” stands for—industry oldsters know, but to ask is to be told, “if I tell you, I’ll have to kill you”. Far be it for me to reveal the secret.)Harry Weisfeld VPI

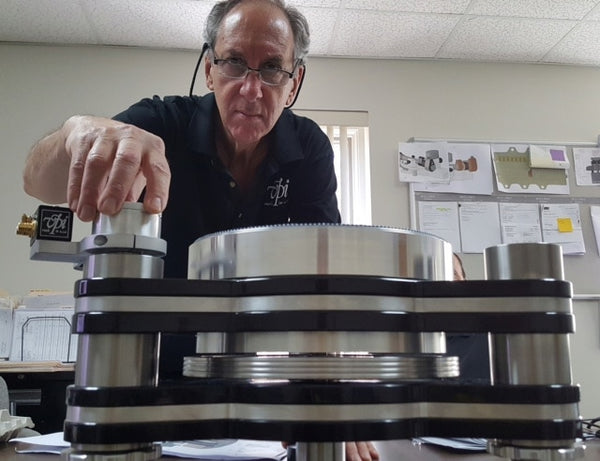
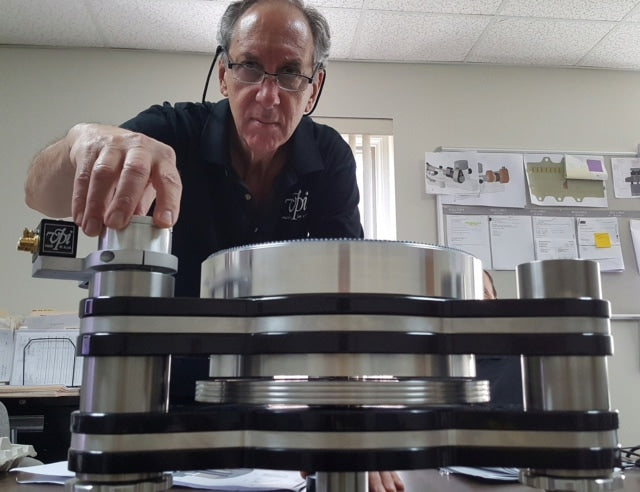
Harry Weisfeld with the Titan

VPI founder Harry Weisfeld was a lifelong audiophile when he met HP at an audio dealership, and a friendship ensued. In 1976, Harry visited the infamous HP manse in Sea Cliff, New York, and after a startling before/after demo, came to covet a record cleaning machine made by the English company, Keith Monks. Problem was, it was a lot of money, $1700 ($7195 in 2016 bucks), more than the newlywed Harry could justify paying. (It was also notoriously fragile, finicky, expensive to maintain and prone to break down—but that’s another story.)

At that time, Harry was an engineer and sheet-metal contractor, working on the construction of some major NYC buildings.  As is the case of many in audio, he was also a racer, drag-racing and maintaining  a Hemi-powered Dodge. So: he had skills, and knew how to design and make things, or get them made.

VPI Industries’ first products were record weights and a turntable isolation base similar to the one made by Mitchell Cotter.  After considerable experimentation, Harry W. took the prototype of his cleaning machine to Harry P., who pronounced it better than the Keith Monks—at a projected price of 20% that of the English unit. The VPI unit was noisy, but it worked well, and was stable and relatively bulletproof.

The cleaning machine was dubbed the HW-16, and is still in production. Most of the original production run from the late ‘70’s and early ‘80’s is still in use, relentlessly de-gunking records. The “Magic Brick” appeared soon after, a hefty wooden block filled with steel plates, designed to provide physical damping to components while simultaneously absorbing stray flux. Despite the skepticism the Brick provoked, it worked, and worked well—enough so that the company is in the process of reviving it as a product.

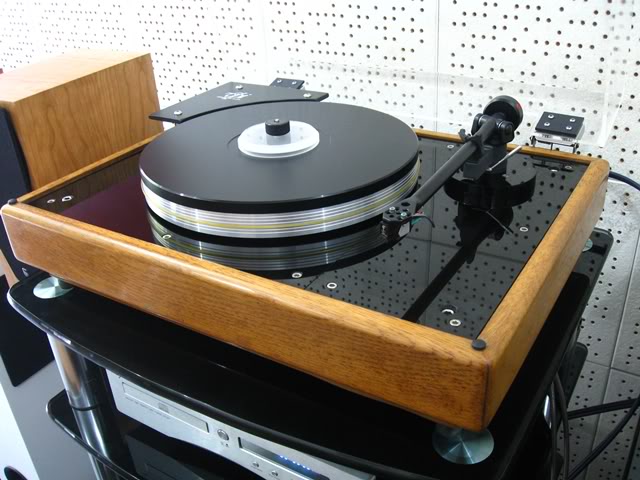
The company’s first turntable, the HW-19, remained in production for many years, and was updated into Mk. 2, 3, and 4 versions. The upgradability of the HW-19 became an earmark of subsequent VPI products, allowing an entry-level product to be improved to near-top-line performance. The TNT followed, Weisfeld’s first venture into state-of-the-art territory. It, too, remained in production for many years, accommodating a number of updates and improvements.

VPI's first turntable, the HW-19

VPI’s first turntable, the HW-19

The company began selling products internationally in 1980, and Harry was able to devote all his time to VPI, along with wife Sheila, in 1983. The Weisfeld’s first son, Jonathan, was born in 1978; second son Mathew was born in 1985. Sadly, Jonathan was killed in a car accident with two other boys in 1995. He had been working with his father on a tonearm design,which was released after Jonathan’s death as the JMW Memorial Tonearm. Co-founder Sheila passed away from cancer in 2011, and son Mat made his first  CES appearance for the company a month later, in January, 2012.

Clearly, there have been upheavals during the time of the company’s existence, both in the world of LPs and in the Weisfeld family. At a late-‘80’s CES, during the rise of CDs and digital audio, a fellow manufacturer asked Harry what he was going to do in five years—presuming that the market for records and playback gear would be nothing but a memory by then.

“I dunno,” said Harry. “I’ll think of something.”

As it turned out, all Harry had to do was keep on keeping on: as others exited the market, VPIs share of the shrinking market grew. When the market grew, as it has over the past decade, the company was well-positioned with a familiar name, a history of technical innovation, and durable, upgradable products—and business boomed.

Son Mat was a high-school technology teacher at the time of his mother’s death, and for a while, split his time between teaching and working at VPI. In fairly short order, Mat went full-time at VPI, and was named President of the company by Harry…who promptly retired.

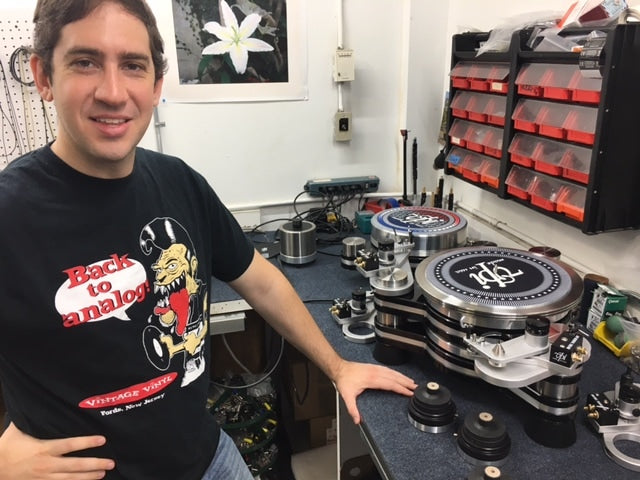
Matt Weisfeld

Mat Weisfeld

In the past few years, Mat has introduced a string of new models, showing his own particular style with the Nomad, Traveler, Player, Prime, Avenger, and others. It’s hard to keep up.

Harry has been busy during his retirement. Annoyed at the proliferation of gigantic, Rube Goldberg-esque turntables with six- and seven-figure price tags, he designed the massive Titan, promising state-of-the-art performance at a fraction of the cost of those other units. $48,000 is by no means chump change, but the combination of rim-drive, magnetic coupling, extensive multi-level isolation, multiple arm bases and an all-new, all-analog speed control unit is clearly not cheap to make.

Says the man who has likely heard and owned every credible turntable ever made, “It’s the first turntable I’ve ever heard that sounds like reel-to-reel tape.”  Harry owns seven reel-to-reel decks and is contemplating building his own…so  that’s quite a statement.

Meanwhile, Mat Weisfeld and new wife Jane are ready to take the second generation —and third?— of VPI to even greater heights. Knowing Harry, his “retirement” will consist of more than playing golf!


RMAF Past, RMAF Present, RMAF Yet to Come

Bill Leebens

In years past I looked forward to RMAF as an opportunity to escape the perpetual swampy humidity of Florida, enjoy some actual crisp weather, and see leaves changing color. It was also the premier social event of the audio calendar (yes, I realize that “social” and “audio” may seem like an oxymoronic combination…but trust me on this), and one of the rare occasions when I was able to meet with colleagues from all over the world. There was also that one time when…oh, never mind. But high altitudes can be tricky for flatlanders.

Much has changed.

For the past two years I’ve lived and worked in Colorado, about 40 miles from the Denver Tech Center Marriott where RMAF is held. For all practical purposes, RMAF has become my home show. So, there is no longer the shock of 20% humidity and temperatures in the 60s that were so invigorating when traveling from Florida. I’ve been watching leaves start to change color for weeks now. And—importantly— I’ve learned how to drink at altitude.

The elements of shock and disruption that I always looked forward to no longer apply—but RMAF is still the premier social event of the audio calendar. Other shows have made headway, but they lack the heritage and history of RMAF: 2016 is the 13th edition.

I often make fun of the audio community, but in its weird, dysfunctional way, it is like a family. –No, strike that: it is a family. This year there have been a lot of changes and disruptions in our little world, with upheavals in the world of audio shows as well. The news that RMAF was facing some serious challenges tied to unfinished renovations at the Marriott provoked a number of sky-is-falling comments, but as always, solutions were found, and Marjorie Baumert will manage—did manage— to produce another memorable show.

Yes, there will be some omissions and changes, things will look different or will be in different places, and some attendees and exhibitors will pass. That’s hard for us obsessive types. Oh, well. Get over it; the show must go on. Will go on.

As any veteran audio show exhibitor can and likely will tell you at length, exhibiting at an audio show is a pain in the ass. Imagine shipping valuable, often unique items halfway around the world, hoping they escape the potential brutality of shippers and the unpredictable whims of customs, and make their way to the right place at the right time, in one piece and fully functional. Hell, as much as these folks travel, it’s tough enough for them to arrive fully functional.

Add in the joyless trudge that is air travel these days, the unpredictability of hotel room construction and acoustics, the variability of AC shared with hundreds of other high-powered systems…

Get the picture? I’ve had two years to tweak my audio system in my Colorado home, and I’m still not happy. These folks have to set their megabuck gear up in strange rooms and make that set-up shine, in front of thousands of folks and the press.

In a dayONE DAMN DAY.

Pressure, much?

It’s a job I’m happy to leave to the experts. I’ve been to a lot of shows over the last 30 years, but I’ve never aspired to doing set-up. Acid reflux be thy name.

The plus side of all this? Other than the possibility of some recognition and affirmation (by no means guaranteed), there is a great joy at the sense of acceptance that comes from being greeted by familiar faces. Many of us work remotely in home offices, making contact with one another by phone or email, and being able to just plain be together is…special. There is also the sense of community that all geek tribes strive for: after months of quizzical glances and comments of “you do WHAT?” and “they still MAKE that stuff? In AMERICA??”…it’s just a relief to be surrounded by folks who understand, who get it.

By the time you read this, RMAF 2016 will be over. I hope you managed to attend, and I’m sure it was a grand time.
Next issue, we’ll have pictures and stories from the show. Maybe that way we’ll be able to make sure you understand.


Sigma–Delta Modulators – Part III

Richard Murison

At this point I promised to conclude my mini-series on SDMs by touching on some of the differences between DSD and PCM formats.  Much has been written about this, and it can tend to confuse and obfuscate.  On one hand, with a PCM data stream, the specific purpose of every single bit in the context of the encoded signal is clear and unambiguous.  Each bit is a known part of a digital word, and each word stipulates the exact magnitude of the encoded signal at a known instant in time.  The format responds to random access, by which I mean that if we want to know the exact magnitude of the encoded signal at some stipulated moment in time, we can go right in there and grab it.  Of course, when we say “exact” we understand that to be limited by the bit depth of the PCM word.

The situation with SDM bitstreams is slightly different, and I will illustrate this with the extreme example of a DSD 1–bit bitstream.  On one level, we would see the DSD bitstream as being exactly identical to what I have just described for the PCM case.  Each bit is a known part of a digital word, except that in this case the single bit comprises the entire word.  This word then represents the exact magnitude of the encoded signal at a known instant in time – but to a resolution of only 1–bit.  That is because the DSD bitstream has encoded not only the signal, but also the heavy dose of shaped Quantization noise that I have been describing in noxious detail.  That noise gets in the way of our ability to interpret an individual bit in the light of the original encoded signal.  By examining one bit in isolation we cannot determine what part of it is signal and what part is noise.  It is exactly like looking at one single ballot paper and attempting to draw conclusions regarding the outcome of the election.

If we want to extract the original signal from the DSD bitstream, we must pass the entire bitstream through a filter which will eliminate the noise.  And because we have already stipulated that the SDM is capable of encoding the original signal with a very high degree of fidelity, it stands to reason that we will require a bit depth much greater than 1-bit to store the result of doing so.  In effect, by passing the DSD bitstream through a low-pass filter, we end up converting it to PCM.  This is how DSD-to-PCM conversion is done.  You simply pass it through a low-pass filter.  The resultant PCM representation can be very close to a perfect copy of the original signal, limited only by the accuracy of the low-pass filter used.

Unlike SDMs, digital filters are very well understood.  There is virtually no significant aspect of a digital filter’s performance which has not been successfully analyzed to the Nth degree.  The filter’s amplitude and phase responses are completely known.  We can stipulate with certainty the extent to which, in any given implementation, computer rounding errors are going impact the filter’s real-world performance, and take measures to get around that if necessary.  In other words, if we know what a given filter’s input signal is, then we can determine exactly, and I mean EXACTLY, what its output signal is going to be.  SDMs, as I have attempted to describe above, are not like that.

So, for some, we finally come to the $64,000 question – what does all that mean for the DSD-vs-PCM argument?

I cannot offer you a simple gift-wrapped answer to that.  I still have a lingering preference for the sound of DSD over PCM, although the technical arguments offer no sound basis upon which to stake an absolutist position.  Also, there are some absolutely stunning 24/352.8 PCM recordings out there from Northstar Recordings that may just be the finest I have ever heard.  Whatever….

In the meantime, I offer the following talking points:

DSD is primarily listened to by audio enthusiasts.  The market for DSD comprises people who like music but still desire to hear it well recorded.  It is still a small market, and it is served almost exclusively by specialist providers who are happy to put in the time, expense, and inconvenience required to generate a quality product for their customers.  People like Cookie Marenco at Blue Coast Records, Jared Sacks at Channel Classics, Morten Lindberg at 2L, Todd Garfinkel at MA Recordings, Gus Skinas at Super Audio Centre and many others focus on delivering to consumers truly exceptional recordings of uncompromised quality.  All this despite the fact that DSD imposes some very severe limitations on what a record producer can do in his or her studio.  Surprisingly, maybe, there are even signs that it is becoming the norm these days for high end classical music to be recorded in DSD – and as often as not in DSD128 (and even DSD256).

There are, in my view, three main factors at play.

First, tools do not exist to do even the simplest of studio work in the DSD domain.  Even fundamental operations like panning and fading require conversion to an intermediate PCM format.  Forget added reverb, pitch correction, and any number of studio tricks of the Pro-Tools ilk.  All that stuff, if done at all, has to be done in the analog domain.  Recording to DSD forces recordists to strip everything down to its basics, and capture the music in the simplest and most natural manner possible.  That alone usually results in significant improvements in the sort of qualities that appeal to audiophiles.

Second, when remastering old recordings for re-release on SACD, for digital download as DSD files, or even for archival purposes, mastering engineers will typically pay a lot more attention to many of the fine details that would normally be dismissed for a commercial CD release.  There will be no product marketing types peering over their shoulders, waving their MBAs and demanding “More compression! More compression!”  The mastering engineer will get the opportunity to dust off that old preamp he prefers to use, or those old tube amplifiers that he only brings out when the suits from the label are not prowling around.  Try listening to Dire Straits’ classic “Brothers In Arms”, which sounds a million times better when specially remastered for SACD (I particularly love the Japanese SHM-SACD remastering) than it ever did on any CD, even though the master tape was famously recorded in 16-bit PCM.  Go figure.

Third, unless you have one of the few remaining ancient Sonoma DSD recording desks, if you are recording to DSD the chances are you will be using some of the latest and highest-spec studio equipment available.  That’s where the DSD options are all positioned.  You will probably be using top-of-the-line ADCs, mics, mic preamps, cables, etc.  As with most things in life, you tend to get what you pay for, and if you are using the best equipment your chances of laying down the best recording can only improve.

So I like DSD, I continue to look out for it, and it continues to sound dramatically better than the vast majority of CD audio that comes my way.  Is that due to some fundamental advantages of the DSD format, or is it that PCM offers a million new and exciting ways to shoot a recording in the foot?  I’ll leave that for others to decide.


More Flutes

Lawrence Schenbeck

A few weeks ago we stuck one toe in the deep waters of music for transverse flute, an instrument played by lots of Western musicians. The website flutemonkey.com lists 50 great flutists, although (ahem) not the person highlighted in our previous column. (Flute politics? More likely just anglophone chauvinism). I like that flutemonkey’s list includes both Ian Anderson of Jethro Tull fame and Johann Joachim Quantz (1697–1773), whose guide to flute playing is a classic. Glad to see they’ve got Robert Dick in there too. Sad to see they ignored Rahsaan Roland Kirk.

Today we bring you a toe-dip for two other great flute traditions, those of the recorder and the shakuhachi.

The recorder is a fipple flute, ubiquitous in school music programs and early-music ensembles. I myself learned to push air through a column in third grade thanks to something called a Flutophone. (This led to my joining the school band and majoring in clarinet for a while in college.) The cool thing about recorders is that they’re easy to play. You can concentrate on other things: learning how to count beats, read music, listen to those around you.

“Easy” has nothing to do with what the greatest recorder players have achieved, though. They toot rings around everyone else in spite of that. In TMT #13, you got a wee taste from Kathryn Montoya. It’s not hard to find more, but may I recommend an outlier’s choice? Try The Amorous Flute (Decca 440079), which features early-music pioneers David Munrow and Christopher Hogwood on recorders and keyboards respectively. (And here is a shout-out to ArkivMusic, who do so much to keep these old recordings available today.) Let’s hear “For the East India Nightingale” from Six Tunes for the Instruction of Singing-Birds (1717) as played on the flageolet by Mr. Munrow:

00:00 / 00:49

My 21st-century recorder heroine is Michala Petri, for the same reasons I champion Sharon Bezaly. She’s a phenomenal musician, but she’s also allied herself with excellent recording engineers. Her label (it’s hers, literally) brings out exceptionally produced music spanning a variety of genres. Much of it features Petri and/or guitarist/lutenist Lars Hannibal. You can hardly go wrong with any of their releases, many of which can be previewed on ClassicsOnlineHD.

I recommend Danish and Faroese Recorder Concertos (OUR 6220609), because of its unusual but welcoming repertoire. Like a number of modern soloists, Petri is enriching the repertoire for her instrument with an ongoing program of commissions. My favorites on this album are “Moonchild’s Dream” and Territorial Songs. You can sample both by clicking on the catalog number above. The color combinations these composers—Thomas Koppel and Sunleif Rasmussen—achieve with a modern orchestra and an ancient solo instrument need to be experienced at length.

Once you climb into the Wayback Machine, however, you’ll find the hottest spot for flutes and recorders was the Baroque era: good recordings of Vivaldi “flute” concertos, including the famous Tempesta di mare, RV 98, lie thick on the ground. Many experts now consider this concerto to have been intended for transverse flute, but that didn’t stop Giovanni Antonini and Il Giardino Armonico from recording a smashing version of it over twenty years ago. It’s still my favorite. (Careful, don’t confuse this Tempesta with a couple of other, non-flute concertos bearing the same nickname.)

00:00 / 01:06

If you want to hear Petri herself go to town on Baroque materials, try her Virtuoso Baroque album (OUR  6220604). But be forewarned, it’s a grab-bag, with some transcriptions that don’t match the intensity and expressive range of the originals, e.g., Tartini’s “Devil’s Trill,” intended for virtuoso violinists.

So why not give Dialogue: East Meets West (OUR  6220600) a shot? It’s very High Concept: ten young composers, five Danish and five Chinese, were commissioned to write duos for Petri and Chen Yue, a master of two ancient Chinese flutes, the xiao and dizi. These are varied works performed with a sense of adventure that helps overcome the collection’s inherent limitations of timbre and texture. Here’s a bit of “Sparkling/Collision” by Li Rui, a young Chinese composer who works folk songs and other traditional melodic patterns into her music:

00:00 / 01:38

Fun! Best enjoyed in small doses, though.

Now that you’re launched on recorders, let’s do the shakuhachi. The most important wind instrument of Japan, its use dates back well over a thousand years. Central to any shakuhachi library should be Shakuhachi – The Japanese Flute (Nonesuch, various formats). Originally issued in 1977, it features the astonishing Kōhachiro Miyata in a handful of classics for the instrument, including “Tsuru no Sugomori,” (“Tenderness of Cranes”), which references the loving behavior of parent birds, and “Shika no Tōne” (“The Sound of Deer Calling to One Another”). Not all shakuhachi music draws upon nature for inspiration. Another prominent tradition stems from its use as an aid to meditation. Zen monks have been known to play the shakuhachi in a busy marketplace, covering their heads with a basket as they do so. Reflecting that heritage, Miyata begins his recital with the spare, slow prelude “Honshirabe.” Long tones, audible breathing, and flutter-tonguing also contribute to the other-worldly sound of the shakuhachi. We’ll sample “Tsuru no Sugomori”:

00:00 / 01:55

If you’d like to hear the shakuhachi in ensemble with some of its customary partners, try Ralph Samuelson’s The Universal Flute (Innova 942). This recent recording emphasizes newer compositions, including music by Americans Henry Cowell, Richard Teitelbaum, and Elizabeth Brown. But it also includes Teizo Matsumura’s landmark “Shikyoku Ichiban,” with lovely koto playing from Yoko Hiraoka:

00:00 / 02:11

Lots more out there. The Yamato Ensemble offers a 24-bit download of traditional repertoire, for example, and you may prefer that to Samuelson’s more eclectic approach. It’s attractive, peaceful music, well worth exploring.


Seljalandsfoss Iceland

Seljalandsfoss Iceland

Seljalandsfoss Iceland

Paul McGowan

Seljalandsfoss is one of the many natural wonders in Iceland. Located in the country's southern section, the waterfall drops 60 meters and is fed from a volcanic glacier. This photo was just too breathtaking not be a Parting Shot for Copper.


Issue 17

Issue 17

Issue 17

Bob DAmico