There aren't many inexpensive upgrades you can add that are as easy to install and effective as a Power Port and installing these in your home couldn't be easier. It's a great Saturday afternoon project.
Getting the power out of the home's AC receptacle is the first place we should concern ourselves with proper connectivity.
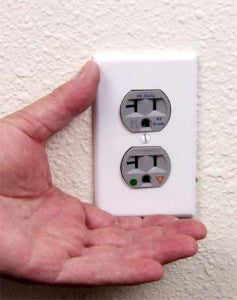
Most homes have a $0.99 “contractor's special†installed in the wall socket. While these are perhaps adequate for a toaster, a lamp or a bathroom utility, they are hardly appropriate for a high-end stereo or video system.
Typical contact materials found in 99% of all home electrical systems are brass which can and does lose connectivity over just a few months.

Power Ports replace these sub-standard power connections and can contribute greatly to the performance and long term reliability of your AV system.
Why risk poor connectivity?
We would recommend replacing every AC receptacle in your home that has any form of audio/video equipment connected to it.
The list would include power amplifiers, preamplifiers, digital source equipment, televisions, RPTV's, projectors, receivers. In short, any piece of home AV equipment you care about should be connected through a Power Port.
Installing a Power Port couldn't be easier
We estimate the average time to install a Power Port is approximately 15 minutes or less.
We replaced 5 sets of duplex sockets in the PS Listening room on a Saturday morning in about one hour.
After the Power Ports were installed we reconnected the equipment, let it warm up for another hour and were delighted with the results.
Step one
First things first. Make sure the power is off to the receptacle you want to replace. This is really easy to do.
Perhaps the quickest method is to plug a lamp into the receptacle and make sure the lamp is illuminated.
Have a friend watch the lamp while you go and find the circuit breaker that is powering the receptacle.
As soon as the lamp goes out, have the friend make sure it does not power the lamp in either the top or bottom plug.
 Step two
Remove the cover plate.
This is achieved by simply removing the small screw in the middle of the plate and pulling the cover off, thus exposing the old receptacle.
As an added precaution, if you have one of the AC noise sniffers we recommended in the PS Tips section , place this inside the receptacle area just to make sure the power is completely off. These AC noise sniffers are readily available at any hardware store.
Now, remove the top and bottom screws of the receptacle to move it from the wall.
Step three
Remove the wires from the old receptacle.
Using a Phillips screwdriver, remove the white wires from the old receptacle, then the black wires, and then the ground wires. Actually, you can do this in any order you wish just as long as you keep track of the wire colors. Black is hot, white is nuetral, and green should be ground.
 Step four
Remove the Power Port from its package and attach the wires to the Power Port.
The Power Port is marked “white†and “black†so you know exactly where to place the wires and keep the polarity correct and safe. Look closely at the front of the Power Port and you'll notice the nomenclature that tells you.
Simply attach the wires in the proper place, screw them down tightly.
The ground wire goes on the green screw on the side of the Power Port.
Step five
Place the Power Port back into the wall cavity.
Position the Power Port so it lines up with the female threads of the wall box and use the two included screws to re-attach it to the electrical box.
Basically just reverse the procedure used to remove the original receptacle.
Once the screws are in place, line up the Power Port so it is straight.
Step six
Replace the cover plate and you are done!
Now, continue replacing each receptacle associated with any AV equipment in the same way and you will be guaranteed a perfect connection every time you use your equipment.
 That's about it!
As we said, it doesn't get a lot easier when it comes to making a serious improvement to your AV system.
Power Ports are affordable, they provide an excellent long-term level of connectivity to your system and are fully UL approved.
If you have any questions our customer service people stand ready to help.
Why depend on an aging and corroding brass receptacle to power your equipment?
We realize that there will be those skeptics in the audience that don't really believe this will make much of an improvement. Certainly that is one of the reasons we offer a full money back promise on the Power Port.
Perhaps it is time we spend as much care with our AC power connections as we do with our AV signal connections. It isn't hard to imagine the need for a quality interconnect cable and equally it should not be difficult to imagine the benefits of properly connecting your equipment to its source of power.
If you are interested in outfitting your listening room or AV room with a great receptacle, we would encourage you to consider the Power Port.
It is truly one of the easiest and quickest upgrades you can make to your system and it's an upgrade that will last the lifetime of your home.