One of the best improvements you can make to your home's high-end audio or video system is to use dedicated AC lines. This guide will help you install one.
A dedicated AC line is simply a separate AC wire going back to your home's circuit breaker box. Instead of the standard AC feed with multiple AC outlets available for many pieces of equipment, a dedicated line is a "home run" single-use wire from the equipment it powers all the way back to the circuit breaker box where the AC power comes into our homes.
Stereophile editor John Atkinson writes "For less than the cost of a budget power amplifier-a mere $373.45—the electrician ran two new 20A lines to the listening room, one with the hot on one side of neutral, the other on the other. Each had its own circuit breaker and each fed two hospital-grade wall sockets. (These orange receptacles grasp the prongs of AC plugs with a clasp akin to the Vulcan death grip.) All source components and the system preamplifier were plugged into an Inouye AC conditioner, in turn plugged into one of the new lines; power amplifiers were plugged into the other new line.
The sonic effect was nothing short of stunning. Within the context of a power amplifier's characteristic sound quality, bass fundamentals relatively dropped away to minus infinity, such was the increase in their weight, while the WATT/Puppy's "hump" in the upper bass became considerably less bothersome. Yes, the characteristic sounds of components were not changed-black was not rendered white-but the differences between those characters was heightened, the overall quality of each enhanced. The sonic contrast knob was turned up a notch, if you will, the blacks becoming a deeper black, the whites becoming more brilliant."
Strong praise indeed for such an inexpensive addition to your home audio or theater room.
If you're unfamiliar with AC wiring or nervous about doing this yourself, we highly recommend hiring an electrician to do it for you. The cost will probably be less than $500 and may be worth every penny. However, if you feel good about tackling this yourself, here are some tips and help.
In its simplest form, we want to run an AC wire from the target outlet in our home AV system area, back to our circuit breaker. The wire will be attached to an AC receptacle on the equipment side and a newly added circuit breaker on the feed side. A dedicated line will have its own circuit breaker as well as AC outlet.
Most homeowners, including many DIYers, are intimidated by home wiring and electricity in general. This is understandable. Electrical current is difficult to grasp as a concept. It can't be seen but it can certainly be felt. Be advised that you will be dealing with potentially lethal voltages so any work you do must be done when the power is completely off.
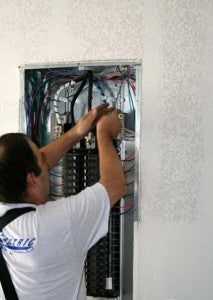
Our first recommendation is to have a certified electrician do the installation. Our own Scott McGowan decided on that route and here is Part One of his journey, followed by a step-by-step DIY article for those of you wanting to tackle it yourself.
httpv://www.youtube.com/watch?v=ZqmyPoiBDRA
Here is an overview of what needs to be done with a bit of info at first.
Electricity Distribution Point: The Circuit Breaker Box
Electricity enters the home from the electric company into the circuit breaker box. Older homes may have a fuse box. Sometimes the term load center service box is used. In any event, the power comes in to the main circuit breaker at 220 Volts. Usually, it is 100 Amps.
But most appliances in the US run on 110 Volts. What gives? Well, the 220 V can be split. So, in our example, two 110V 20A circuits are the same as one 220V 20A circuit. In reality, in almost all homes, the electrical power is broken down at the circuit breaker box into a combination of 110V and 220V circuit breakers.
The purpose of the circuit breaker (or fuse) is to break the circuit when too high an amperage demand is put on the circuit. This should only happen if too many high demand appliances on a circuit are running at the same time.
So the power has been delivered to the home and distributed to circuit breakers at the panel or fuse box. What next? The juice has to be delivered to our receptacle where it will do its work and make life good. This, obviously, is done via wiring.
Just any wiring? No. Before running any new wiring, check with the local building codes to know what to use. In most cases, it will be specified as 12 or 14 gauge nonmetallic sheathed cable, known simply as Romex. Inside this cable are plastic coated copper wires which are color coded. For a few years, aluminum wire was used, but like lead-based paint, it was found to be dangerous and was discontinued.
We would always recommend going to the heaviest gauge copper Romex you can use, never less than 12 gauge and typically 10 gauge (the lower the gauge number the thicker the wire conductors).
We would recommend that you install a PS Audio Power Port or Power Port Premier AC receptacle at the end of the dedicated AC line. This is a superior power delivery receptacle which can accept up to a 10 gauge wire for best performance.
The most difficult task
Running the wire from the circuit breaker box to the receptacle. Sometimes you get lucky and can run the Romex under the house or through the attic, thus making it easier than having to place it inside the walls on an existing home. Once you manage to run the wire from the circuit breaker to the intended AC outlet, which should be mounted in an outlet box screwed or nailed to the studs, the worst is over.
Running Wire in a Permanently Unfinished Space
Before you proceed, be certain you won't change your mind later and decide to finish the space, because you'll have to redo the wiring. This method requires considerably more wire than what you'd use on a space that will be finished because you're essentially following the path of the wood framing up, down and across. This keeps the wire from spanning open spaces, where it could be snagged and pulled by yard tools or sports equipment in the garage, for example.
What You'll Need
* Both municipal and national codes require insulated wire, and most commonly used is 12- or 14-gauge nonmetallic sheathed cable known as Romex. We recommend 10 gauge.
* Plastic cable straps, also known as plastic staples.
* Hammer
How to Run the Wire
1. Plan your wiring layout. First, decide where you want your new electrical box that will house the Power Port AC receptacle. Attach the box, whether metal or plastic, to the studs with nails.
2. Run the wire through the box and out the side hole in the direction of the breaker panel. Leave enough wire to reach the breaker box, plus at least another foot, for later connection.
3. Secure the cable to the very center of the wider face of the studs within 12 inches of each box and at least every 4 feet with plastic cable straps, also called plastic staples. Be extremely careful not to nail through the wire itself. Wherever the cable doesn't snug up to the wood, secure it with an additional strap. All wires must be at minimum 1-1/4 inches from the front and back edges of all studs and joists.
4. At the top of the stud, route the wire up to the header (the piece of wood that runs across the top of the studs) and across its face.
5. To move horizontally, bring the wire up to the face of the header atop the stud, then staple it as you carry it across until you reach the stud that bears the box you want. Choose the shortest route possible, of course, running the wire against wood. Keep the wire as protected as possible – and as visible and accessible as possible.
6. Continue stapling the wire until you reach the box.
7. Snake the wire into the box and out through the front about 10 to 12 inches, then double back , leaving about 20 to 24 inches total, and run the wire out of the box toward the next one, keeping the wire securely stapled to the wood.
8. To cross the ceiling, travel with the joists, not across them, securing to the wider, vertical side of the joist. You don't want wire without wood to support it.
Running Wire in a Space to be Finished
It takes less wire and less effort to run wire on a wall that's going to be finished. The major difference, in this case, is that it's perfectly fine to span the space between the studs with the wire since it will be enclosed and won't be in danger of being snagged or pulled.
To run wire across the studs:

1. With a 1-inch spade bit mounted on a right-angle power drill or standard drill with a right-angle attachment, bore a hole through the wide face of the stud. The hole needs to be at least 1-1/4 inches from the front edge of the stud to meet code requirements and to prevent accidental contact when the drywall goes up. There are no rules regarding how high you place the hole and wiring – the best route is the one that leads directly to the box.
2. Following the steps above, install the electrical box. Instead of following the perimeter of the framing, just run the wire through each hole, spanning the space between the studs.
3. If you're going to insulate the wall before installing drywall, be sure to leave enough slack in the wiring between the studs so there's no tension when the insulation is put in. Insulation is commonly sliced so the wiring is encased in it, but check with your insulation's manufacturer for their recommendations regarding installation around the wiring.
Tips
* It's imperative that you contact your municipality and ask for its specific codes regarding electrical wiring. There may be differences from national code, and you don't want unpleasant surprises later.
* Find out if permits are required.
* Metal nail guard plates can be placed over the edges of studs to protect the drilled hole and wiring inside it.
Installing the AC receptacle
Installing the AC receptacle is quite easy. Most receptacles are clearly marked as to hot (black wire) neutral (white wire) and ground (bare copper wire.
Connect the Romex you have installed to the AC receptacle, install it in the wall and place the protective cover for it.
Recommendations
We recommend you use a 20 amp breaker for even the lowest draw source equipment feed.
We recommend you use the heaviest gauge Romex wiring for the dedicated line, preferably 10 gauge.
We recommend you use a PS Audio Power Port or Power Port Premier AC receptacle to feed the power from your new dedicated line to your equipment. It's a bit of work to install a dedicated line, so make sure you take full advantage of the improved connectivity available with a PS Power Port.
Electrical Do's and Dont's
DO always turn off the breaker before working on anything, such as changing a ceiling fan, replacing a light switch or installing a home theater. We recommend being ultra safe and turning off the main breaker for the entire home. Always test to see if there is no AC power by using a meter. Remember, AC can kill you.
DO test wires with a meter.
DON'T work off a metal ladder.